

How To Repair Broken Tombstones
Basic Repairs is our section that walks you through repairs to tablet style grave markers. Broken tablets are some of the most common things found and asked near. This department will begin with elementary single breaks and work up to multiple breaks that can resemble jigsaw puzzles. Many of our members have become quite skilled in this area. It did not happen overnight. It took lots of practice and patients, so don't exist overwhelmed. Because they all started out just similar you with the very basics. This department volition besides show you lot these repairs beingness fabricated in two different settings. In the field or outdoors, and indoors. Repair piece of work in the field is the nearly common and practical setting for many reasons due to logistics and permissions. Repairs made indoors have the advantage of controlled conditions and the convenience of a workshop setting.
The basic repairs covered in this section are methods that should be taught to you in a hands on mode through a workshop or class. They can exist much more than complicated than we are able to express on this website. This section is designed as an introductory overview only.
Because this department touches on what we are terming as "Bonding Agents", pregnant any product or material used to join grave markers together. These will likewise exist addressed in other sections of the website under PRO VS CON and under SOURCES…Pro VS Con Results. Please go to these sections for a more in-depth look and understanding before attempting whatever of these procedures.
The post-obit is a not bad tutorial on repairing broken tablets, mainly marble tablets, with a focus on repairing them with an approved epoxy. Nosotros experience this is a groovy place to start when it comes to repairing or mending cleaved tablets. More than on this procedure and different means to use epoxy products that are widely accepted across the rest of the land, will be addressed below this commodity.
REPAIRING Broken HEADSTONES
By CCUS members Lloyd Collins of Polk Cemetery Savers and Mark Morton of Gravestone Guardians of Ohio
Headstones in nigh of the cemeteries across the country have either been set in the ground, in slotted bases, and some rare cases in physical. Over fourth dimension, the ground has shifted, rodents have burrowed under the bases, or animals, using them as scratch poles, take pushed the headstones off of vertical or broken them off at or above ground level. Vandals have also acquired damage by pushing the headstones over or breaking them in pieces. Whatever the reason, some of the headstones are broken, sometimes in many pieces. These headstones are predominately of a "Tablet' design. It is to the do good of these headstones to be cleaned, repaired, and reset and so they stand vertical. The headstone tin can then shed water and breathe properly.
The repair of broken headstones is a chore that should not exist taken lightly. This chore takes patience, skill, fourth dimension, and the employ of the proper tools and materials. Few headstones can exist repaired in a day. Well-nigh will take days and some will take weeks before the headstone can be repaired with epoxy, voids filled, engraving restored through the infill, and reset to stand straight on its' own in the cemetery. Every broken headstone is different and although the repair methods may be the aforementioned, the series of tasks will exist different. This standard will attempt to provide bones methods and define a series of tasks that volition be needed to repair ii types of broken tablet headstones that are in two pieces, and a tablet headstone that is cleaved into many pieces that may or may not be attached to a slotted base. If the base of operations of the headstone is still in its' slotted base, simply the peak is in several pieces, the top will accept to exist repaired beginning and then attached to the bottom department.
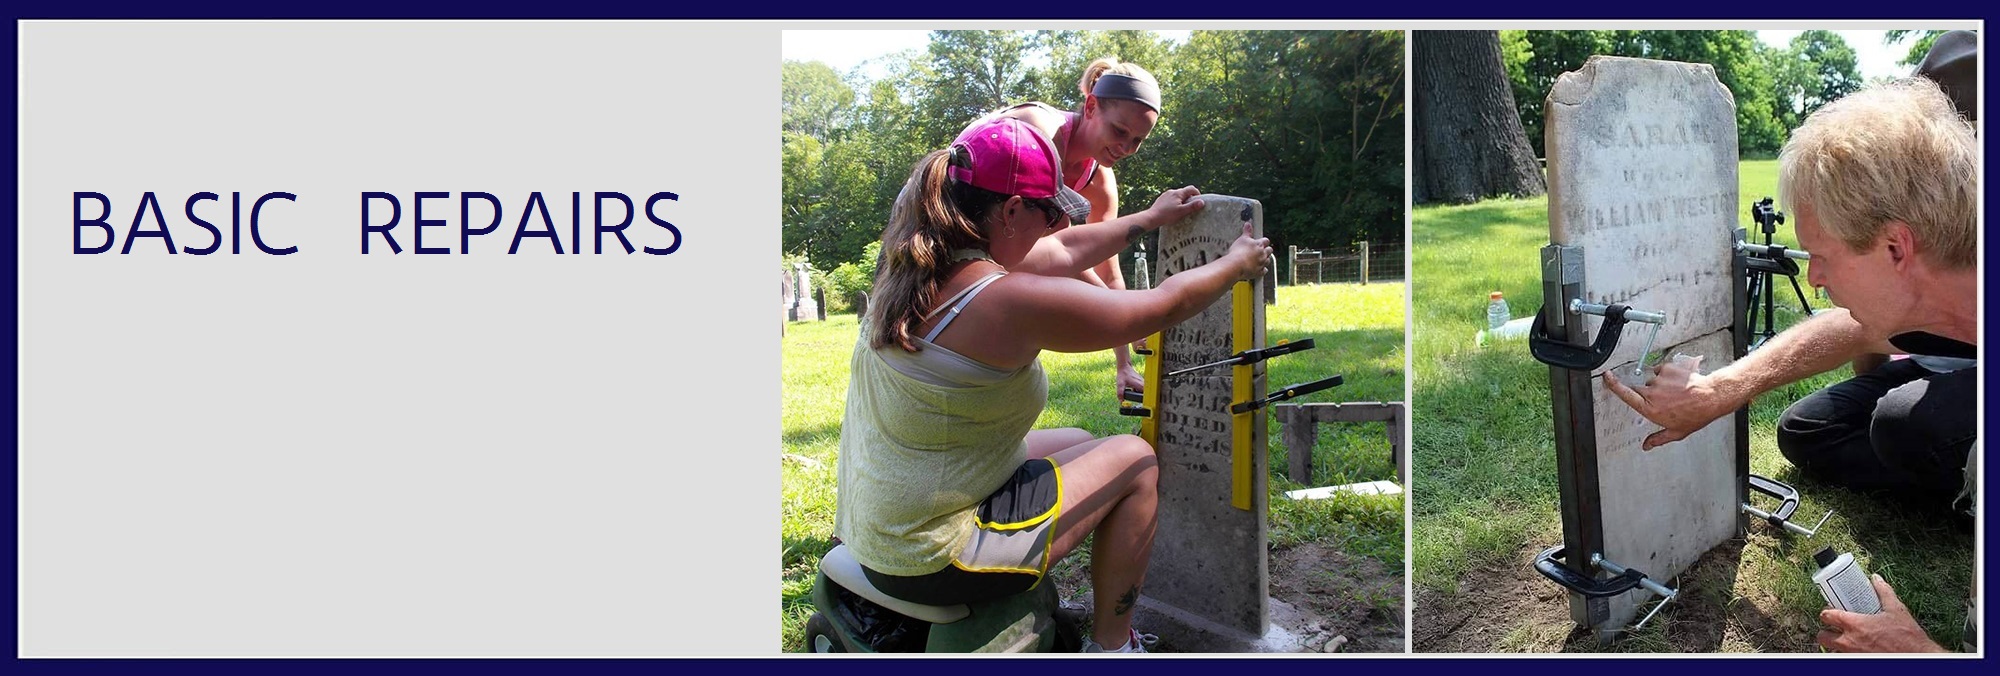
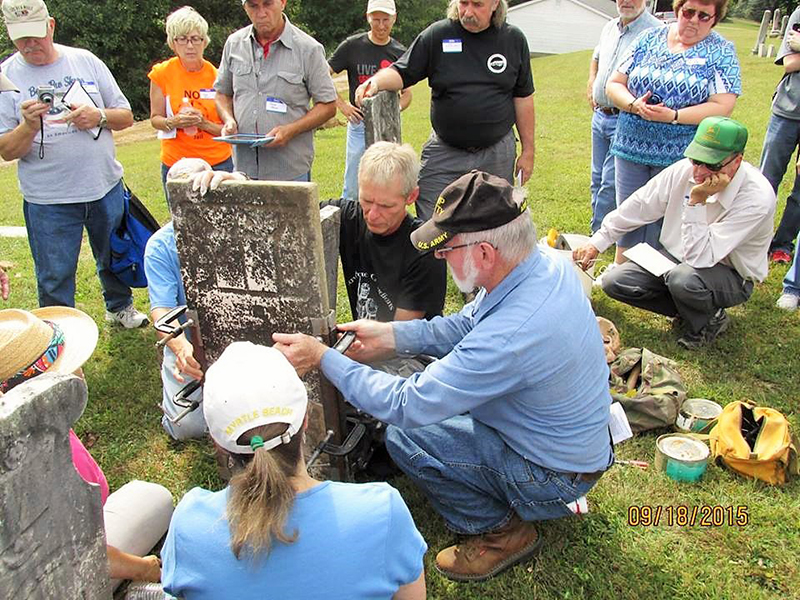
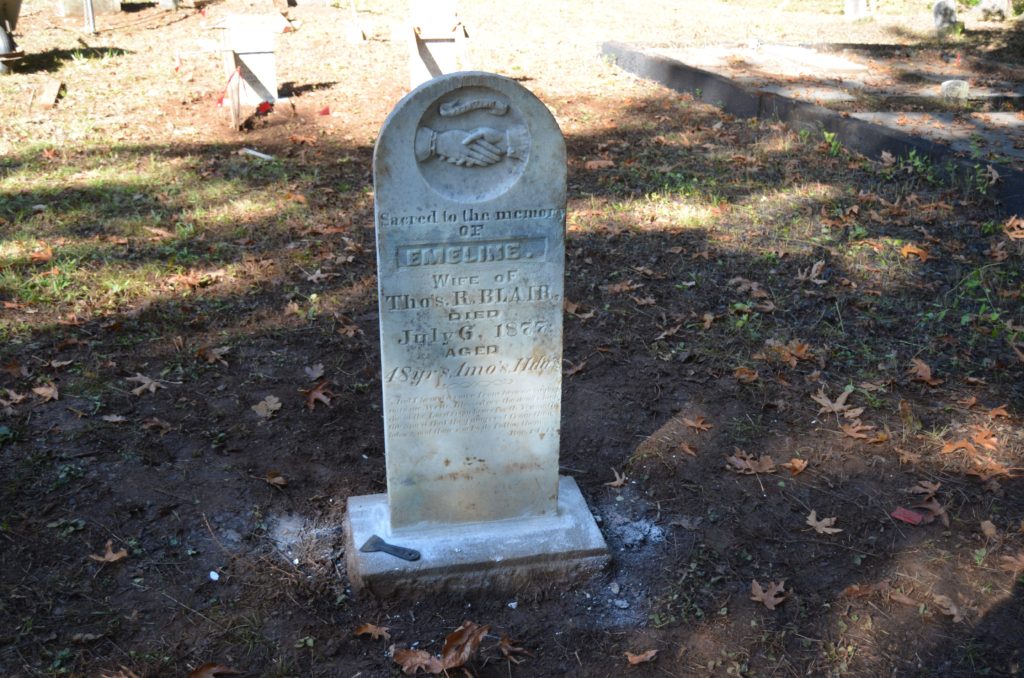
An introductory overview from a cemetery preservation class setting
Tablets in the condition like the one to the left are quite common. This is a white marble tablet that fits into a slotted base and has a single break. This tombstone was chosen to demonstrate how to repair a single pause at a cemetery preservation class.
PRECAUTIONS AND OBSERVATIONS
As with whatsoever work done on headstones, the stone must exist advisedly inspected before whatsoever work is started. Headstones, even though they are made of rock, are very frail. Over the years they may have developed harm from the environment. This damage could include delamination, stress cracks, and areas where water has infiltrated the stone and frozen causing larger cracks or other broken areas. Effort to locate all of the broken pieces, no matter how minor.
After this stone was evaluated and deemed to have no serious delamination or issues of sugaring, information technology was carefully excavated for cleaning and prep. It was cleaned with D/two and left to dry thoroughly in the dominicus. Epoxy should just be applied to dry stones. The edges at the pause were gently wire brushed to remove whatsoever leftover loose dirt that would adversely affect the epoxy bail. Mendable edges like these are the ONLY areas you should always utilize a wire brush on.
At present nosotros are ready to use the epoxy. This stone was mended with a 2 part epoxy meant for this type of preservation. Our method here was to apply a continuous line of epoxy downward the center of the break, staying away from the edges, just making certain we met all contact points. Y'all don't desire to smear information technology on the outer face of the stone. Issues like this are best explained at a hands on class. Epoxies have strong chemical compounds, so ever article of clothing gloves when handling them. And mix the epoxy co-ordinate to the directions on the container.
Afterward the epoxy has been applied nosotros are fix to clamp it together. The surest fashion to guarantee a close as possible fit, is to dry fit the stone together showtime. This volition tell y'all where your contact points are and show you how clean the break actually is. You will also exist able to see where any stone loss has occurred. This volition be very important to detect when you brainstorm the infill process and as well to judge the overall stability of the repaired stone when finished. The infill procedure will be covered further down in this department.
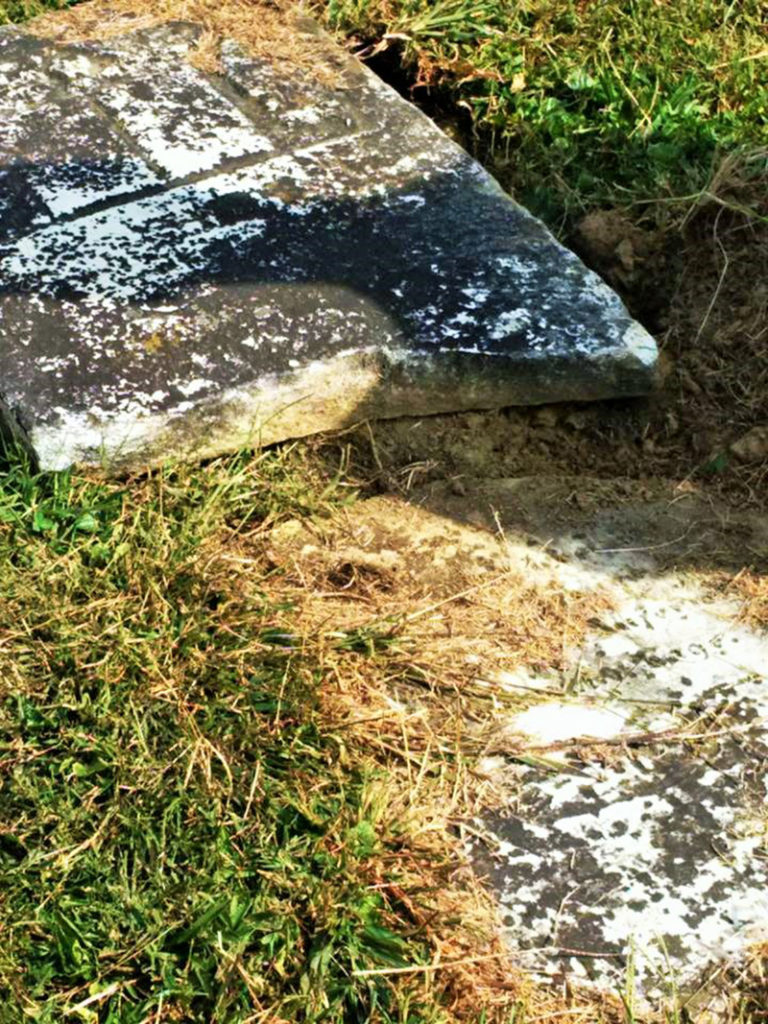
The following are pictures and examples of the types of broken headstones that this standard volition cover in greater detail. Both in the field and in a controlled surroundings and by an experienced grouping of conservators.
A headstone broken into two pieces with lesser prepare in a slotted base of operations, and a headstone that was broken into two pieces and no longer attached to its' slotted base.

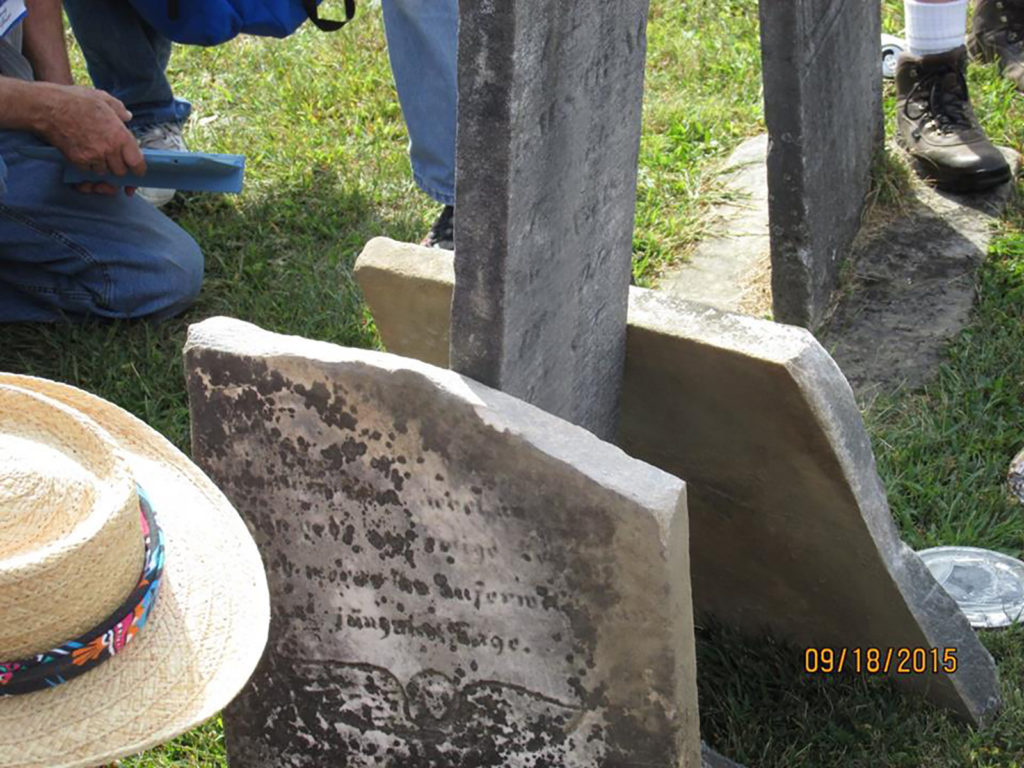
These multiple breaks consist of a headstone that was broken into three pieces, no longer in a slotted base and a footstone in two pieces.
These 3 broken headstones are typically what you will find in cemeteries. There may exist others and you will take to modify repair methods accordingly.
PRECAUTIONS AND OBSERVATIONS
Every bit with any work done on headstones, the rock must be carefully inspected before any work is started. Headstones, even though they are made of stone, are very fragile. Over the years they may have adult damage from the environs. This damage could include delamination, stress cracks, and areas where water has infiltrated the rock and frozen causing larger cracks or other broken areas. Endeavor to locate all of the cleaved pieces, no matter how small.
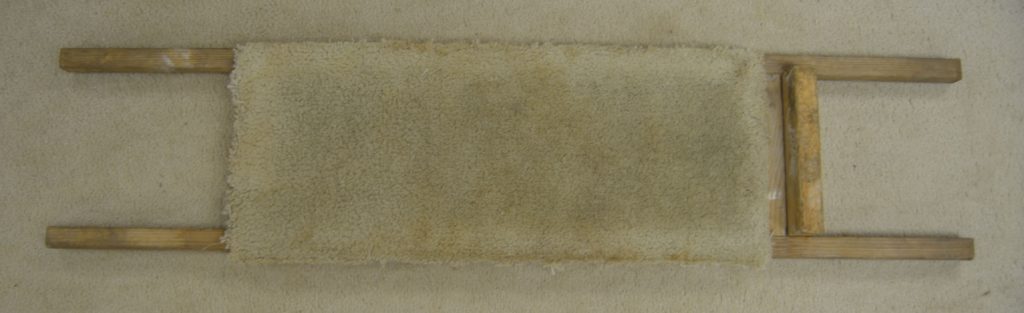
Before moving the cleaved headstone and parts, ensure it is structurally supported to foreclose any new damage. I use a wooden platform that allows the headstone to lie on a carpeting pad. The stone is loosely strapped to the platform and two people can lift and move the headstone without damage.
ASSEMBLING THE PIECES
Work table
Whether you repair the headstone in the field or have information technology to an enclosed store, yous must accept a stable piece of work table and a tarp to cover it. The table should be fabricated of v/eight or 3/4 inch exterior plywood. It can exist placed on two saw horses and screwed in place. The table should be level as possible but admittedly must be apartment. No warps are allowed. A covering of heavy plastic should be used over the plywood. Stretch it and staple it downwardly. This volition forestall any epoxy from sticking to the wood. In some cases a raised platform may be needed to get access to the bottom of the headstone and for enhanced clamping. This is accomplished easily by using 1 i/two angle iron braces and 4 X 4 spacers.
A benefit of a raised platform is that it allows for the clamping of the exterior edges of the headstone to the angle braces.
The headstone must be aligned properly and the stone should be apartment so the faces of the broken pieces align properly. Pocket-sized pieces of plastic should be placed at the broken seams to prevent epoxy from sticking to the bending braces. Another benefit of this method is the capability to turn the epoxied headstone on its' side to clean excess epoxy from the back earlier information technology cures.
It must be clamped properly to allow information technology to exist turned on its' side, every bit in the picture above. Yous may have to epoxy some pieces together on a flat table before you use a raised platform. Case in bespeak…The lower left bottom of the pictured headstone. The small-scale piece was epoxied on the flat table.
Whichever back up table method yous choose, you must ensure proper alignment of the headstone pieces earlier epoxying them together.
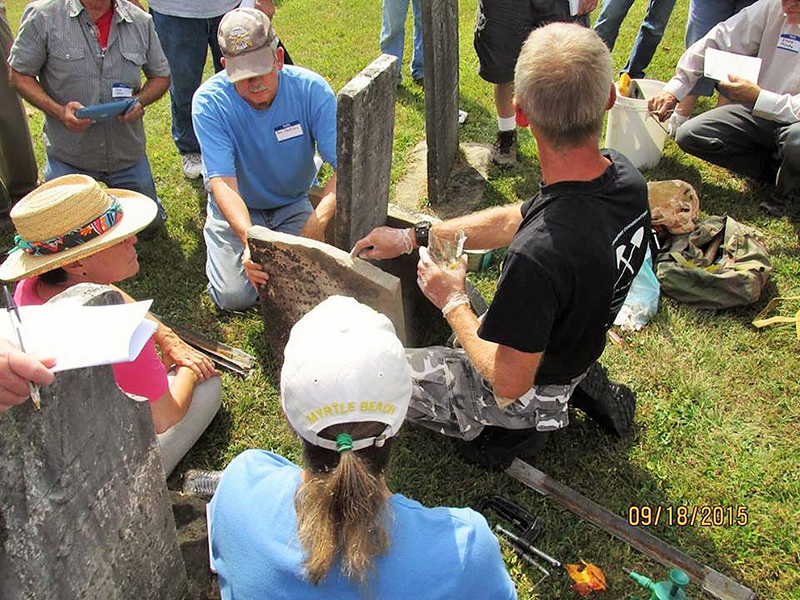
Assembly
Prepare to assemble the "puzzle". Spread out the pieces on the flat piece of work table. Be careful non to damage the plastic embrace. Fit the pieces together. After the pieces are fitted together you will exist able to decide which pieces to epoxy together first and where you will demand infill. If you have establish all of the pieces or you have decided to fill up larger voids, you are ready to clean the parts.
CLEANING THE PIECES
For this repair chore you will exist cleaning a broken headstone. Full general cleaning practices In CCUS Basic Standards…Cleaning, cannot be closely followed at the edges. Cleaning the edges of a broken headstone takes patience, elbow grease, and special brushes. Brushes should be small, similar oversize toothbrushes. You may have to search for them. A pocket-size grout brush and a firm toothbrush should be all that is needed. The broken stone must be carefully cleaned with special care at the broken edges. The edges are incredibly fragile. A uncomplicated brushing can break off small pieces of an otherwise sharp edge. All foreign material must be removed from the broken areas. Specially hard to remove is algae. It will take infiltrated into the stone. Apply an approved biocide to impale the algae. Brush it on with a small paint brush and let it do its' piece of work. This may take several days or longer. Carefully remove the dirt and environmental grime from the broken areas. If you see stress cracks in the broken area, you must try to clean out the crack. You may have to scrape out the crack. Leaving dirt in a crack may cause after breakage if any plant life can have root in the dirt. The residuum of the stone tin be cleaned at present. Be careful near the broken edges. Rinse thoroughly and ensure no cleaning fabric remains on the rock. Permit the stone parts dry thoroughly.
EPOXYING THE PIECES TOGETHER
Now that all of the inspections and preparations are finished, you are ready to epoxy pieces together. There are two types of broken headstones with the bottom still in the slotted base. The first is ane where the lesser section provides sufficient support for the top without using external bracing. Encounter the adjacent ii pictures.
Cleaved headstone with lesser section still in the slotted base, "clamp supported repair".
For this type use the bending braces and clamp them to align the summit to the bottom of the headstone. Ensure the edges and the faces of the headstone are aligned. Make a examination fit before yous epoxy the pieces together. This volition allow you to see where the epoxy should be placed and ensure proper alignment of the broken piece.
Utilise i of the knife grade epoxies under PRODUCTS USED…Epoxies. Thoroughly mix a batch per the manufacturers' directions. If yous recollect you have mixed it enough, mix it for a couple more minutes. Spread a layer of epoxy downward the middle of the broken seam using a wooden craft stick. Apply the epoxy sparingly but ensure all crevasses in the break have epoxy spread into them. It may be necessary to spread epoxy on the other department also. The test fit should have determined the need for this. If you put likewise much epoxy on the cleaved pieces the weight of the rock will push button it out. It will have to be cleaned off before it cures. The play a joke on is to put only enough epoxy to go a secure bond throughout the length of the break without it being pushed out. The rest of the repaired crevice volition be infilled to match the rock. A perfect match will go out most 1/iv inch deep crack to be infilled. Let the epoxy cure based on the manufacturers' recommendations for the temperature. See the section BASIC STANDARDS…Infill.
Cleaved headstone with bottom section still in the slotted base of operations, "brace supported repair".
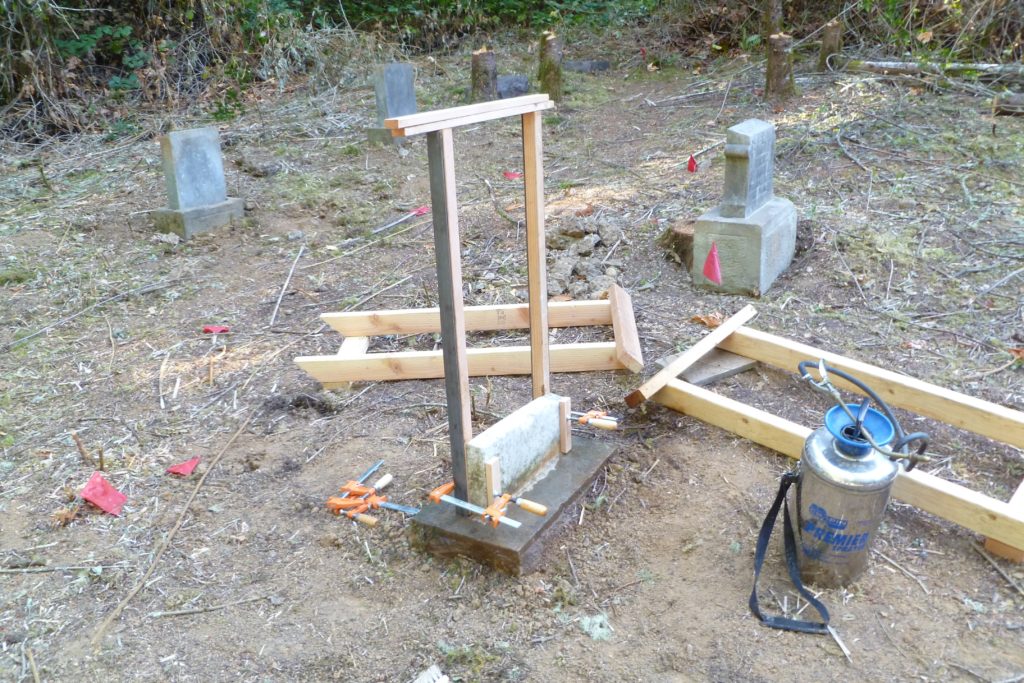
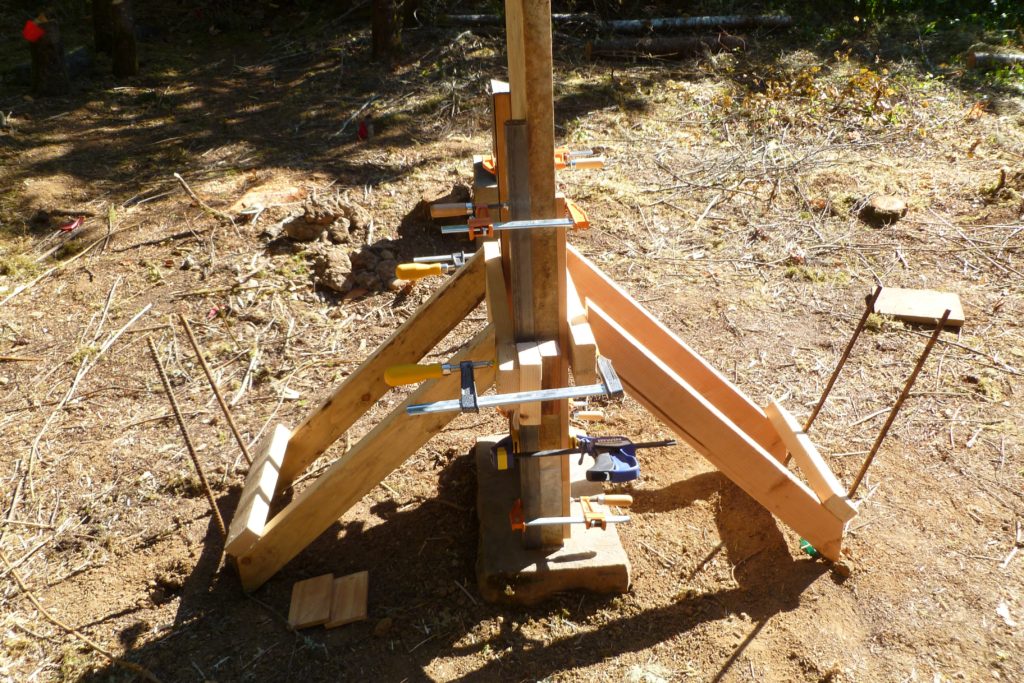
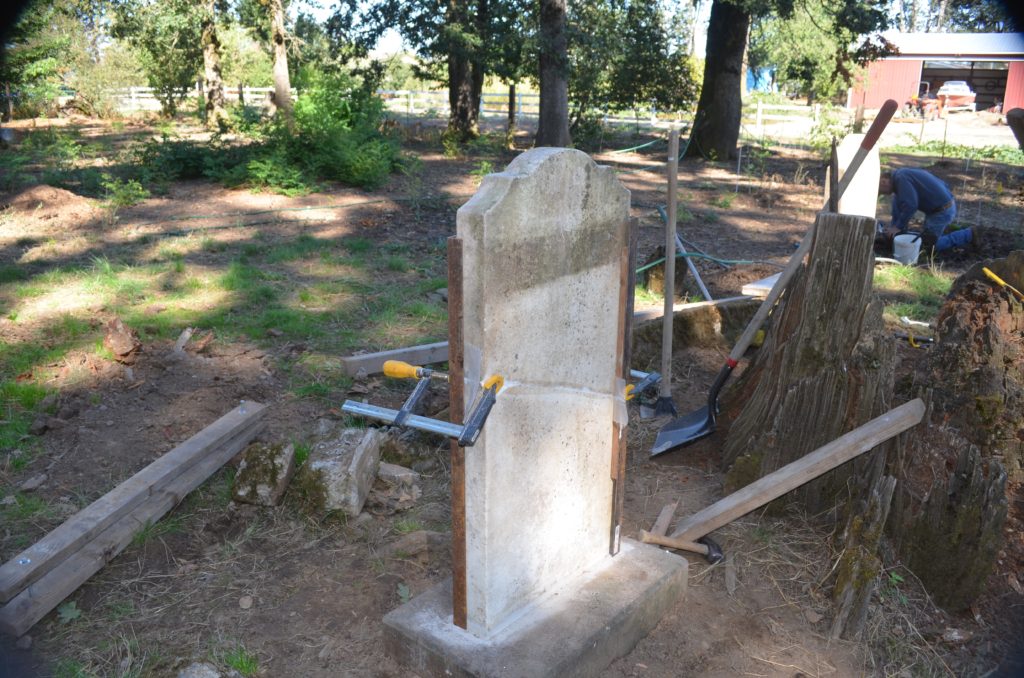
The second blazon of broken headstone is where the bottom department volition non provide sufficient support for the top while the epoxy cures without using external bracing. The top of the headstone is much larger than the remaining piece in the slotted base of operations.
For this blazon use the angle braces and clench them to the bottom of the headstone nonetheless in the base. Test fit to ensure the edges and the faces of the headstone are aligned. Clamp as necessary. The bending braces will assistance ensure the edges and faces are aligned. Identify the external braces in the location they are needed. They can be moved slightly afterward the pieces have been epoxied together. Make some other test fit before you epoxy the pieces together. This will allow you to see where the epoxy should be placed and ensure proper alignment of the broken piece.
Every bit in the previous section, employ i of the pocketknife grade epoxies under PRODUCTS USED…Epoxies. Thoroughly mix a batch per the manufacturers' directions. Spread a bead of epoxy downward the middle of the broken seam using a wooden arts and crafts stick. Use the epoxy sparingly but ensure all crevasses in the intermission have epoxy spread into them. It may be necessary to spread epoxy on the other section too. The exam fit should have determined the need for this. If you lot put too much epoxy on the cleaved pieces the weight of the stone volition push button it out. It volition accept to be cleaned off before it cures. The flim-flam is to put just plenty epoxy to get a secure bail throughout the length of the break without it existence pushed out. The rest of the repaired crack will be infilled to match the stone. A perfect match will leave well-nigh ane/4 inch deep crack to exist infilled. Ensure the pieces of the stone are aligned. Support the repaired headstone with the external braces. Clamp the braces in place. Ensure they exercise not move. Let the epoxy cure based on the manufactures' recommendations for the temperature. See the section BASIC STANDARDS…Infill.

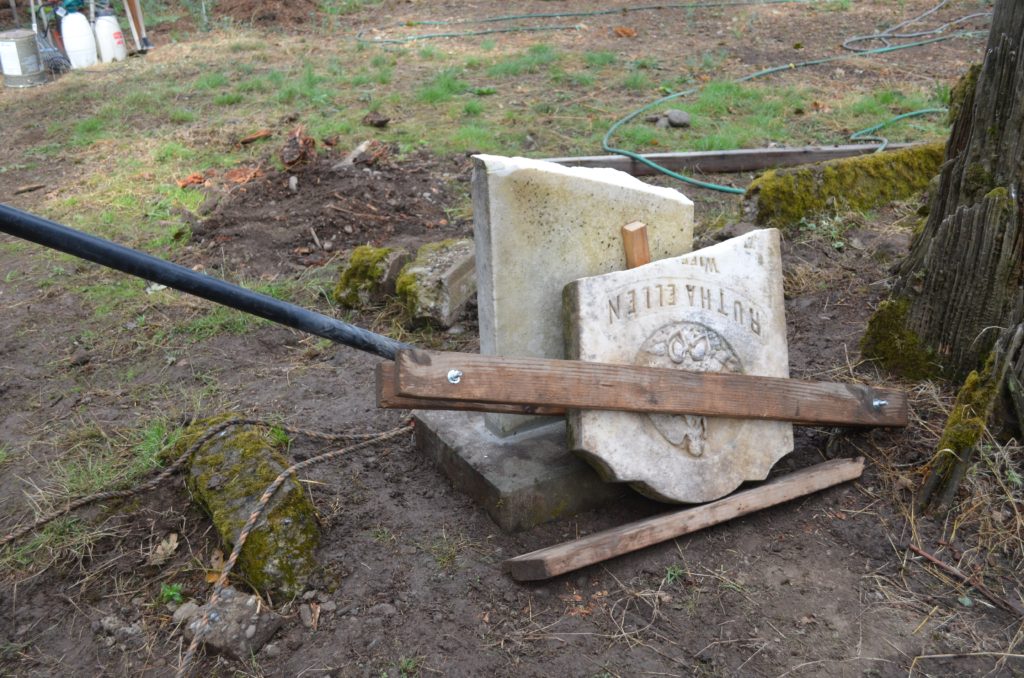
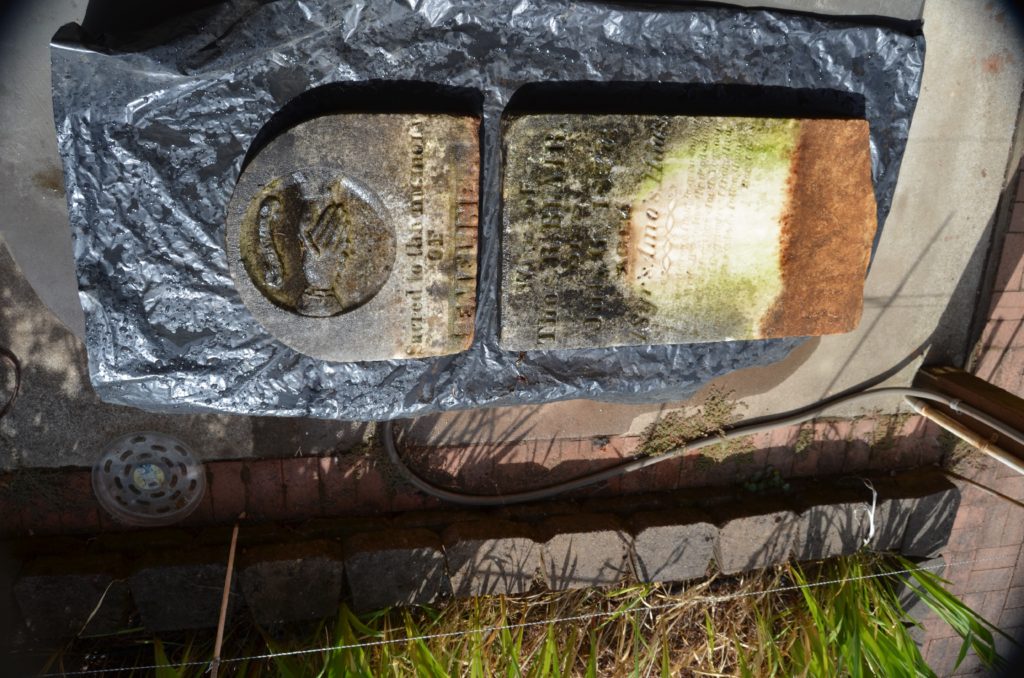
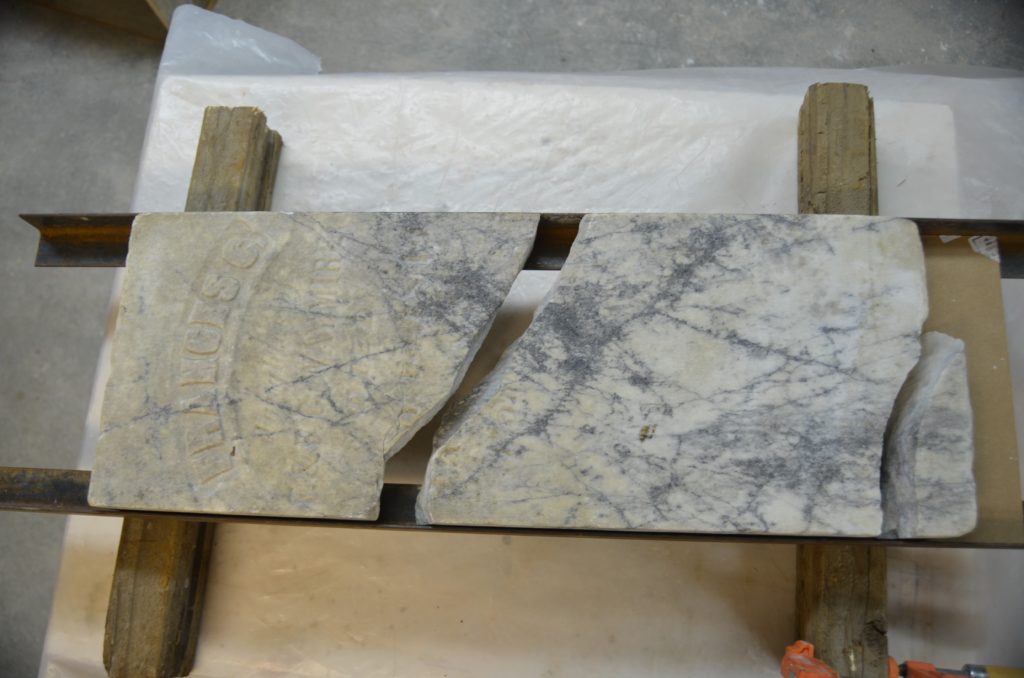
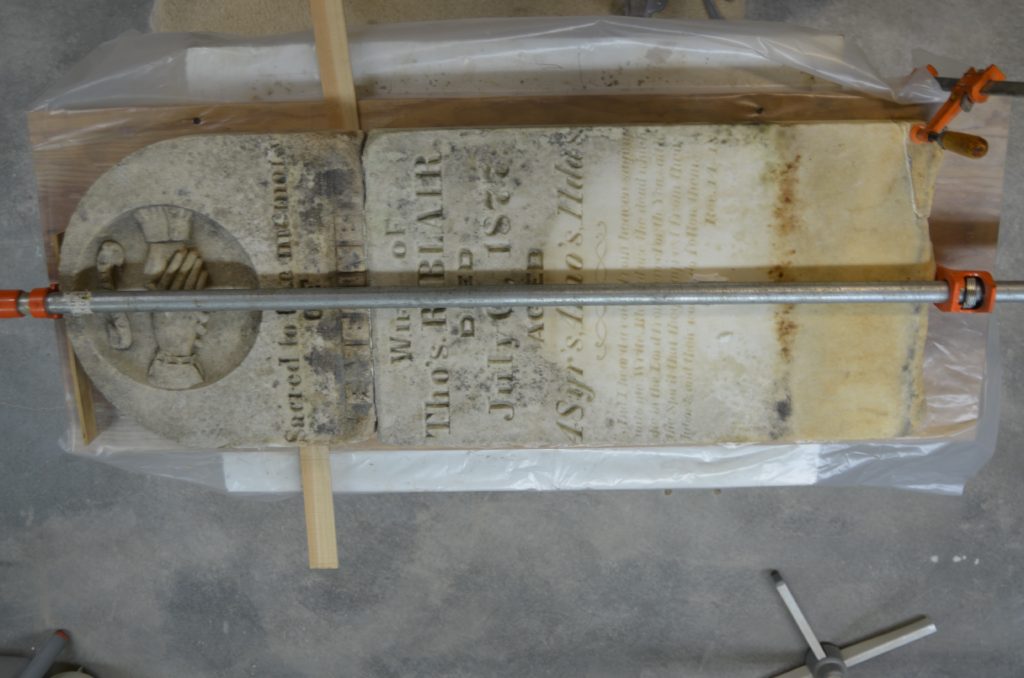
This is the 2d type of broken headstone that is in 2 pieces. For some reason information technology is no longer mortared in its' slotted base. Clean carefully per the previous section, 'Cleaning the Pieces'. This rock had a lot of algae but luckily none in the cleaved areas. There was a lot of staining on the stone. D/2 was used to clean the stone and then a 2nd glaze was sprayed on and left for several days. The stone was cleaned once again and left to dry out. This type of broken rock can utilize either a flat table or a raised platform. Information technology should exist your choice based on the headstone. I used a flat tabular array for this repair. It is important to exercise an alignment fit with any stone you are repairing. This stone needed slight shimming to align the confront of the 2 pieces. When you are sure of the alignment you may epoxy the two pieces together using the procedures previously described. Use whatever clamping is necessary to ensure alignment. Practice not remove the clamps until the epoxy has set.
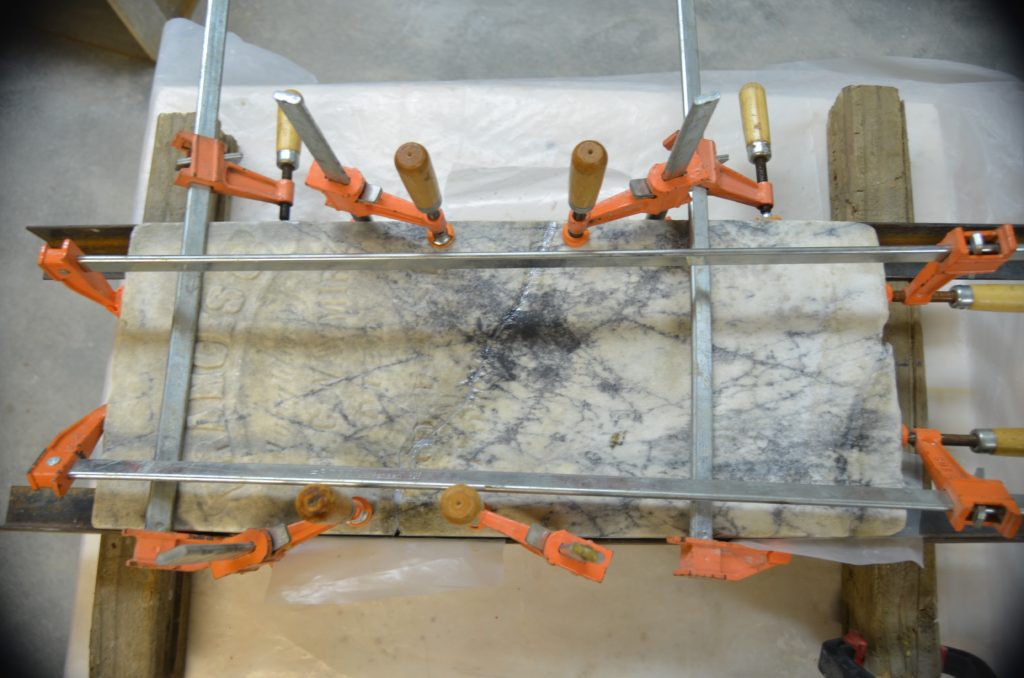
Epoxying and clamping the two pieces
As in the previous section, utilize ane of the knife course epoxies nether PRODUCTS USED…Epoxies. Thoroughly mix a batch per the manufacturers' directions. Spread a bead of epoxy downwardly the middle of the broken seam using a wooden craft stick. Use the epoxy sparingly but ensure all crevasses in the suspension take epoxy spread into them. It may exist necessary to spread epoxy on the other section also. The test fit should have determined the need for this. If you put too much epoxy on the broken pieces the weight of the stone will push it out. It will take to be cleaned off earlier information technology cures. The fox is to put but plenty epoxy to get a secure bond throughout the length of the break without information technology being pushed out. The residual of the repaired crack will be infilled to match the rock. A perfect lucifer will exit nearly 1/4 inch deep crevice to be infilled. Ensure the pieces of the stone are aligned. Support the repaired headstone with the external braces. Clamp the braces in place. Ensure they exercise non movement. Let the epoxy cure based on the manufactures' recommendations for the temperature. See the section BASIC STANDARDS…Infill.
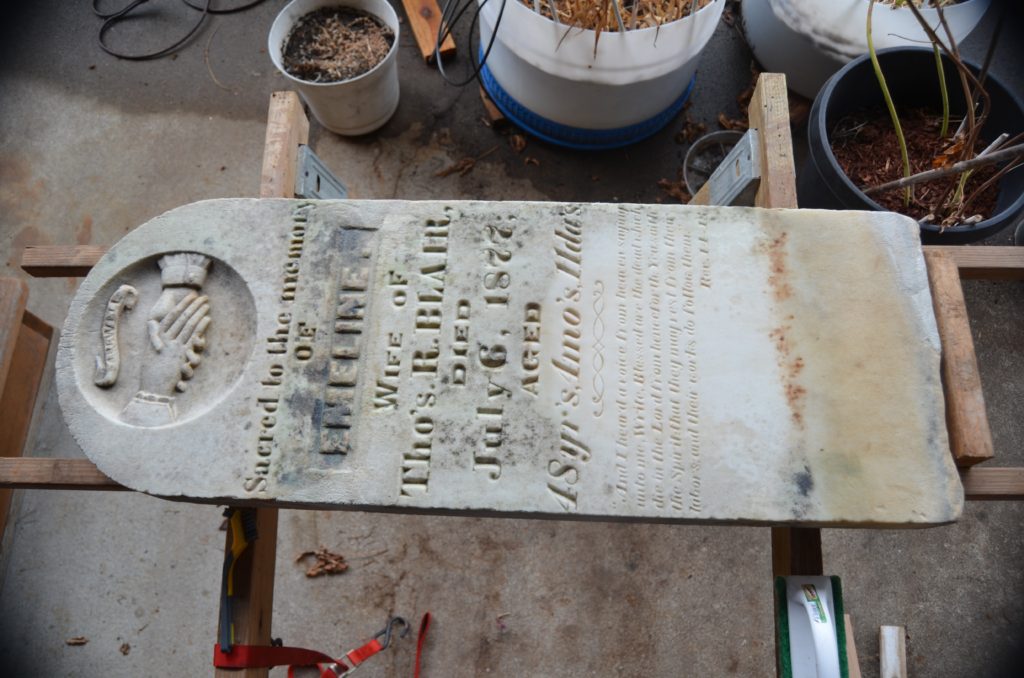
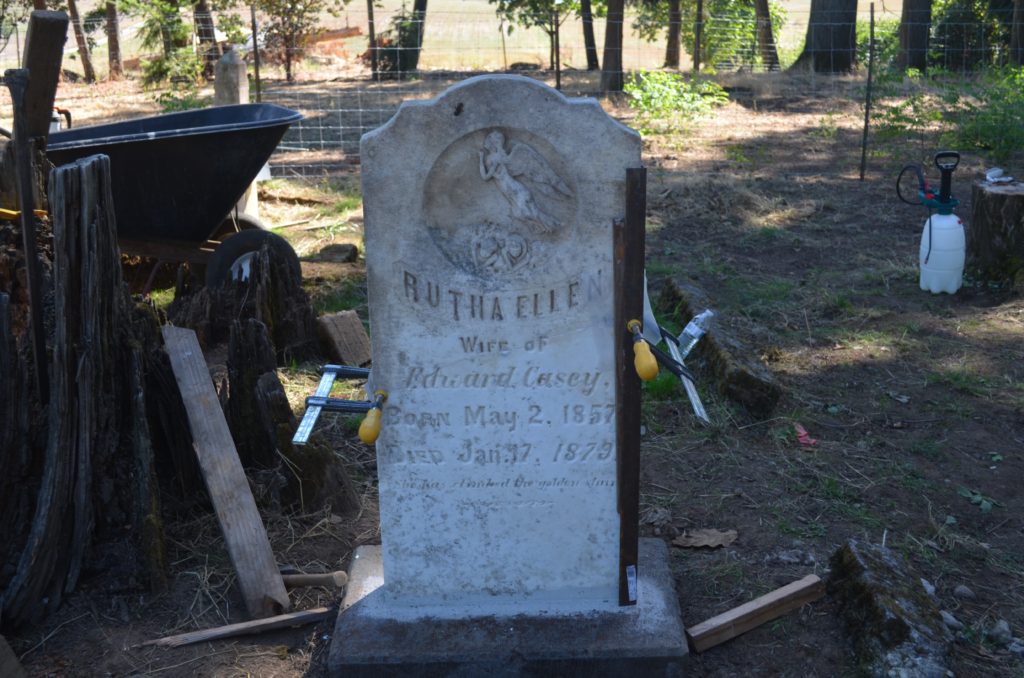
The picture above is the finished headstone. The voids were filled with a mixture of white Portland Cement, lime, fine white sand, and colored to closely friction match the stone. Your void fill mixture may exist different but some take to follow the country guidelines. As you tin see from the motion picture, some of the staining was non removed. D/2 volition work over time and so hopefully more of the stain will disappear. The void fill was left to cure for two weeks and and then the stone was returned to the cemetery and placed into its' slotted base of operations.
Headstone cleaved in multiple pieces

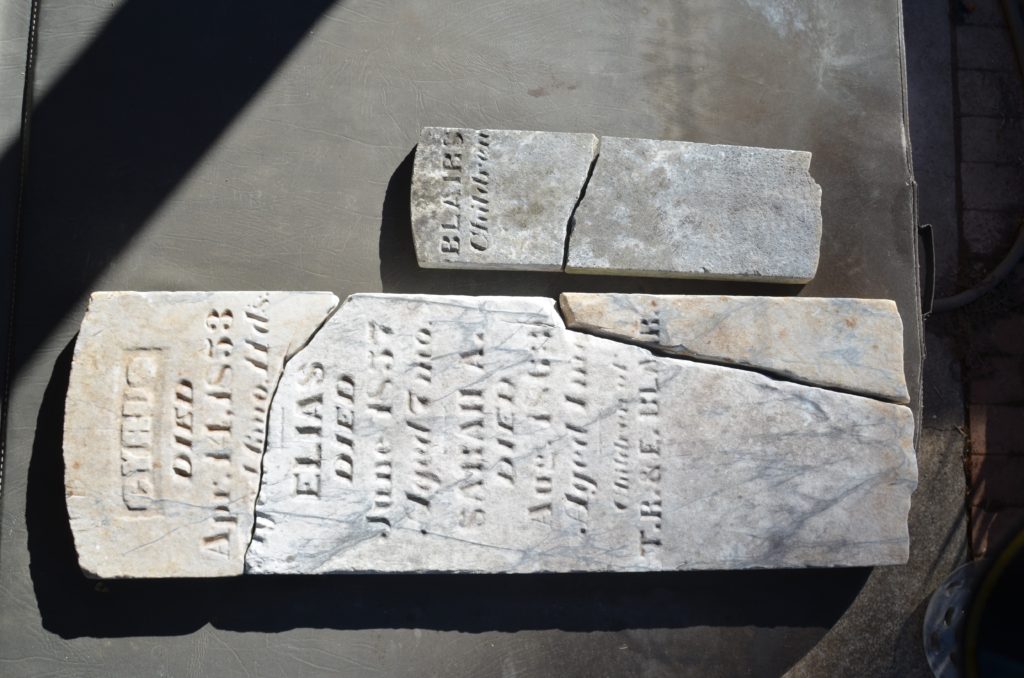
This headstone and associated footstone were institute inside a small-scale concrete-curbed enclosure. Ii of the pieces were buried and were found by probing the area.
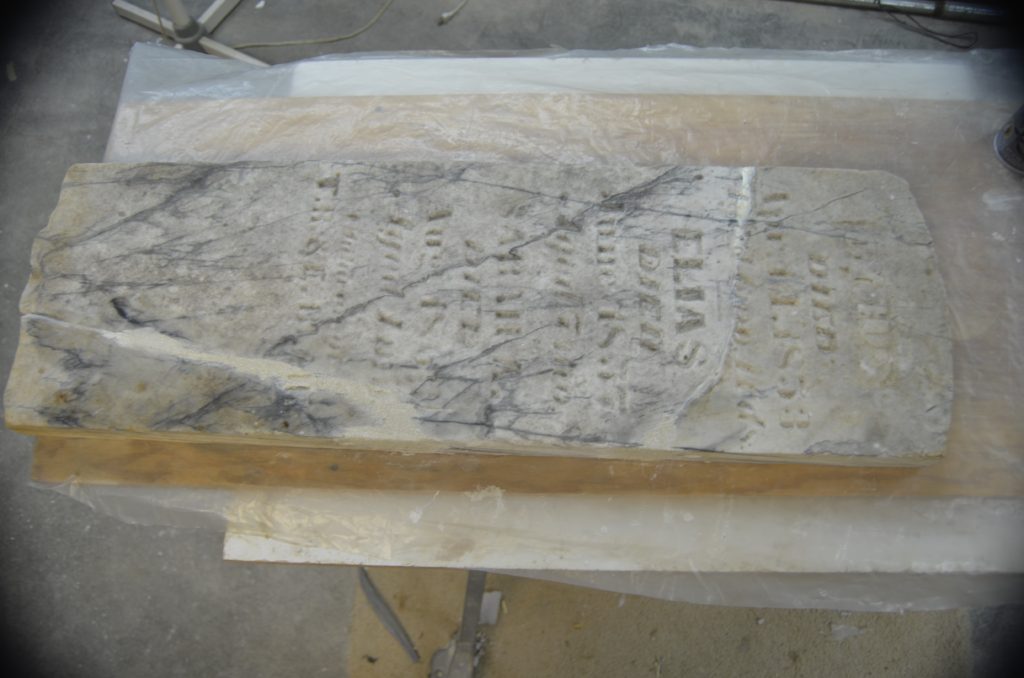
Headstone epoxied with rough infill. Infill was smoothed out before the mixture cured and later on about two weeks, the stone was returned to the cemetery.
For broken headstones like this, the cleaning procedure is the same. Be careful! Afterward cleaning do a test fit to make up one's mind what clamping you need to ensure the parts line upwards properly. This type of break requires two straight edges, ane on each side. Angle braces are perfect for this type of repair. With clamps in place on the largest section, the ii smaller pieces can exist aligned and epoxied and clamped, one at a fourth dimension. After the epoxy cures the infill tin exist added to finish the repair.
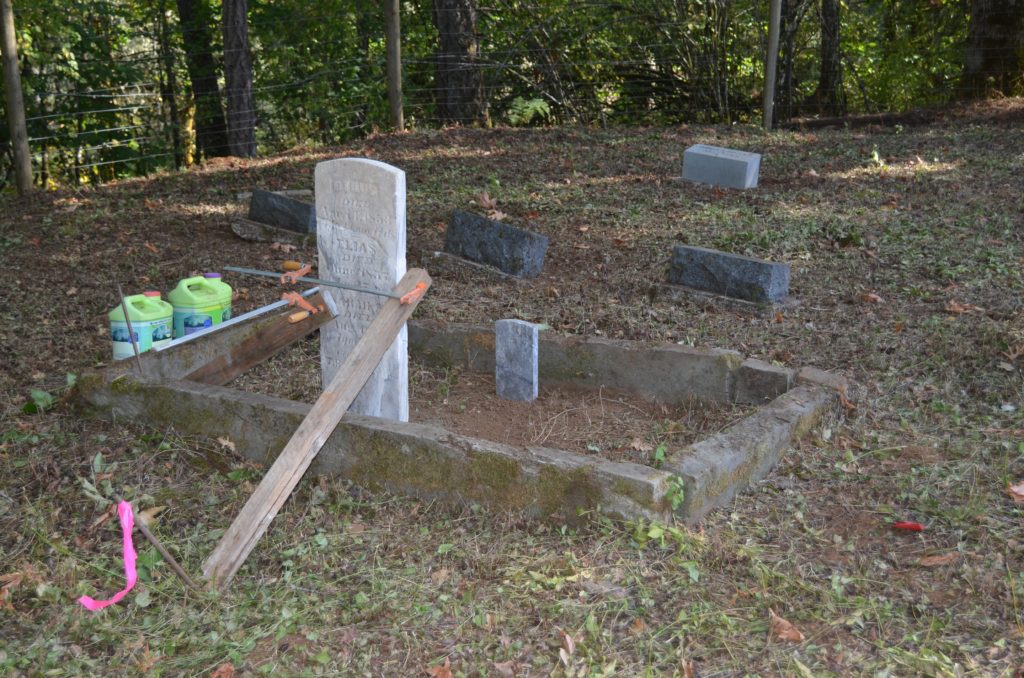
Repaired headstone and foot stone returned to the physical enclosure. Repaired, plumbed, and standing tall.
RECOMMENDED TOOLS AND MATERIAL
Below is a list of possible tools you may demand when repairing headstones:
- Tarp
- Small Brushes
- Angle Braces
- Plastic Scrapers
- 24-Inch Level
- Piece of work Table
- Sponge
- 1×two Wooden Direct Edges
- Mixing Pan
- Saw Horses
- Level
- Orvus Soap
- Approved Epoxy
- Craft Sticks
- Safety Gloves
- Compressed Air
- Sprayer west/Water
- Clamps w/Plastic Pads
- Denatured Alcohol
- D/2
February two, 2022 – CEMETERY CONSERVATORS FOR UNITED STANDARDS
Further Information About Epoxy Methods
We recommend these epoxies…Akemi Akepox 2030, Tenax Domo x, Tenax Rivo 50, and Rivo 15 are skilful choices
There are three basic means to apply epoxy when mending a cleaved tablet. Get-go is to spot the epoxy on the stone at several contact points forth the intermission. This is the most minimalist way. The second is to grade a sparse line downwardly the middle of the break leaving the edges free of epoxy. This is the centre of the road manner. The third mode is to coat the entire break surface with epoxy from ane border to the other. This is the extreme way to epoxy. At the moment many reputable conservators in the field can exist found using and/or teaching all iii methods. And then all three methods will keep to be addressed here.
Recently epoxy utilise has come under some fire from members in the field. This has been for reasons such as failure or non-permeability. The claims of failure in this case are quite simply that the epoxy in question has lost its bond. Permeability…meaning in this case the allowance of water or wet to travel uninterrupted through the stone. Non-permeability is when water or moisture flow are cut off or interrupted. These issues or claims by others in the field are addressed under PRO VS CON…Bonding Agents. Or under SOURCES…Pro VS Con Results. Please go to these sections for a more in-depth look and agreement before attempting whatsoever of these procedures.
An alternative to epoxy apply for mending stones such every bit tablet breaks, comes in the course of new mortar products. These new mortar products announced to be hybrid mortars with bonding capabilities. They are relative newcomers when compared to epoxies and should be strongly considered. Until we can more thoroughly examine and sympathise these new products, the most we tin practice is merely mention them. Nosotros hope to have a much better understanding of these new mortar products over the upcoming yr, and hope to be able to safely add together them to our collection of bonding agents and repair products.
December 23, 2022 – CEMETERY CONSERVATORS FOR UNITED STANDARDS

Source: https://cemeteryconservatorsunitedstandards.org/standards/repairs/
Posted by: bryantentim1964.blogspot.com
0 Response to "How To Repair Broken Tombstones"
Post a Comment